A craftsman belt sander is a machine that shapes and finishes wood and other materials. The machine has an electric motor that operates a pair of drums.
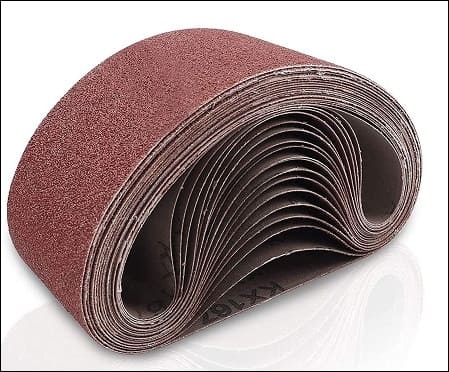
The drums have a continuous loop of sandpaper on them. A craftsman belt sander is easy to operate, and maintenance is easy. Part of maintenance is changing the belt of a craftsman belt sander occasionally.
Eventually, you notice that the sanding paper does not give a perfect grit, and the machine uses much power to do less work.
It is because the belt is worn out, and replacing it helps correct the defects. Knowing how to change the belt on a craftsman belt sander is important to keep it working.
Step-by-step – Changing Craftsman Belt Sander
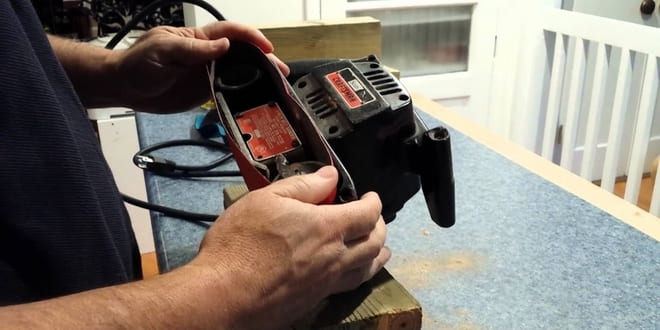
Unplugging the sander
Firstly, you need to disconnect the machine from the receptacle. Doing so gives time for the belt to cool if you are using the machine. After that, locate the tension lever on the idler pulley support.
Slide up the lever towards the front of the machine to release the tension on the belt.
If the top of the sander is flat, placing it on a workbench is easier. It exposes the sanding bottom, making it easy to see the belt.
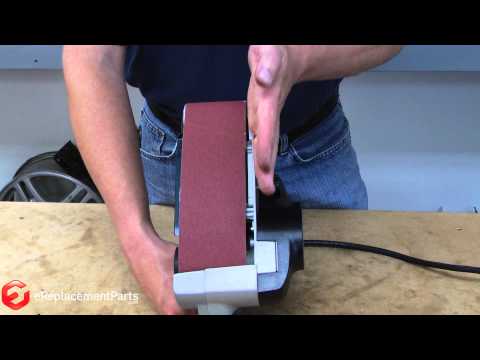
Pull off the old belt
Releasing tension on the belt makes pulling off the belt easy. After gently pulling off the old belt, put on a new belt. When placing the belt, ensure the arrow inside the belt points in one direction with that of the belt when the machine is in position.
Slide the lever down
After you are sure that the belt is in place, slide the lever tensioning down towards the backside of the machine. Doing so locks your belt in position.
How To Adjust The Belt Sander?
Locate the tracking screw.
The screw tracking is a round knob either on the side or top of the Craftsman sander. Flip over the machine for the belt to face up and be visible.
Sander plugging
Connect the machine to a power source. Additionally, watch your belt to determine whether it has tracks or wanders from one side to another.
Adjust the tracking screw.
If the belt wanders outwards like it wants to fly off, turn the screw track clockwise. When the belt wanders inwards towards the machine’s frame, turn the belt anticlockwise.
Make several turns off the tracking screw because small adjustments produce changes in the belt tracking.
What To Remember When Changing The Belt
Make sure you have all the tools you need to work on the craftsman belt sander. You must have the old belt, the new belt, and a screwdriver. If the machine you use has no lever, you must use another way to loosen the belt.
Additionally, check whether it is possible to press the pulley or front wheel against the edge of a wall. Doing so helps release the belt’s tension, making it easy to remove and replace the belt.
Always ensure you unplug and switch off the sander before working on it. Take safety precautions at all times by wearing necessary protective clothing when using the belt sander.
Why you should replace the belt of a craftsman belt Sander
Replacing the belt of your machine is essential because it keeps it running. Ensuring you have a perfect belt in place helps you accomplish your tasks on time and serve many customers quickly.
A worn-out belt slows down the sanding process and uses more power, raising bills and leading to losses. Replacing the belt, Sander ensures the perfect performance of the machine and produces reasonable output.
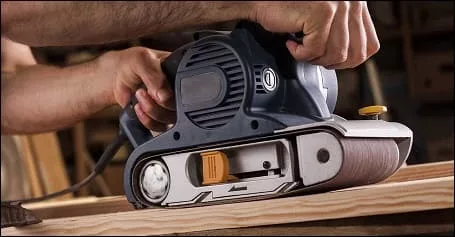
How To Use A Craftsman Sander
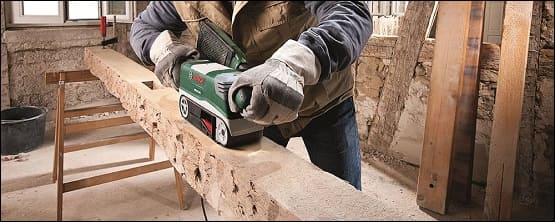
You start by choosing your belt for the job before you start sanding. Begin with a belt that has a coarse grit like forty, eighty, or hundred.
It helps get rid of scuffs and finishes. You may then raise to a belt with a finer grit, like 180 when finishing the project. Release the lever on the machine’s side and slide it to the wheels to insert the belt.
Furthermore, press the lever to close and secure the belt. Secure the clamp material for sanding to your work surface using clamps. Doing so ensures the board does not slip as you sand it.
Notably, put on safety goggles and a ventilation mask to protect you from wood dust accumulating in the air during the sanding process.
Additionally, you may start the sanding process by turning on the machine and letting it run for a little while to get up to speed.
Start with the rear of the machine and ease the belt onto the wood. Make long strokes along the wood grain and apply steady pressure to the machine.
Do not press down too hard because it may gauge the board. Check your work frequently as you sand. After you are through, ease the machine off the board and look at the ventilation bag.
If the bag is full, remove it, empty it, and reattach it to the sender. Finalize by switching out the belt for another with a finer grit. Repeat the sanding process to finalize your work.
Final Thought
A craftsman sander is a reliable machine that will help remove materials quickly. With the machine, it is easy to smooth wood surfaces.
The machine is easy to steer and control. Eventually, abrasive material wears out from the machine’s belt, which calls for replacement. Always take a moment to adjust the belt tracking after changing the belt.
Changing the belt ensures the machine functions normally and results in perfect sanding. Any woodwork needs a craftsman sander, and replacing a craftsman sander’s belt is part of maintenance.
Therefore, it is essential to understand how to change a craftsman belt sander’s belt after it wears out because it cannot give perfect results. Websites offer more information on how to change the belt on a craftsman belt sander and why you need to replace it.