Staple guns are not like normal staplers. The work is different, and the loading and using process is also quite different from the normal staplers.
The main purpose of the staple gun is to force staples into different materials such as plastic, wood, etc. A staple gun is among the best tools that a handyman can keep in his toolbox.
Since staple guns are different than regular staplers, a lot of people might not know the loading and using process.
Which is exactly why we are here today. In this very guide, we have shown how to open a staple gun and how to load it. Plus, using the process as well.
Hope this will be beneficial to you! Have a look!
Bottom Loading Electronic Staple Gun
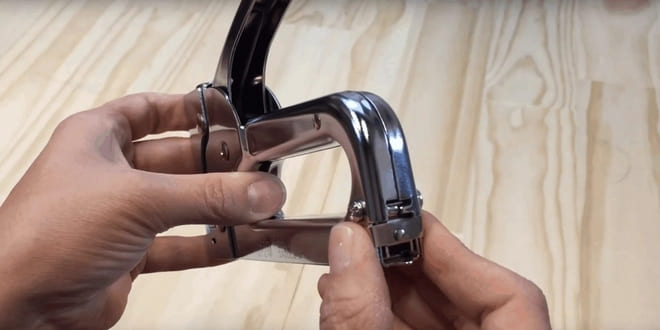
There are different types of staple guns, and the opening differs from them. We will be showing two kinds of staple loading which are very popular and widely used. Starting with the bottom loading model.
Step 1
The very first thing you would want to do is locate the magazine release. The magazine release is a button. When you press it, the staple gun automatically releases the magazine clip where you load the staple pins.
However, if you are new to this, you might not know the location of the magazine release button. In that case, check the backside of the tool.
You might see a clip. In the bottom-loading staple gun, the magazine release is placed on the opposite side of where the staple comes out. We mean the side from where the staple gun attaches materials together.
Look at the opposite of that; you should find it. And before you release the magazine clip, make sure you unplug the gun. Otherwise, it might lead to an accident.
Step 2
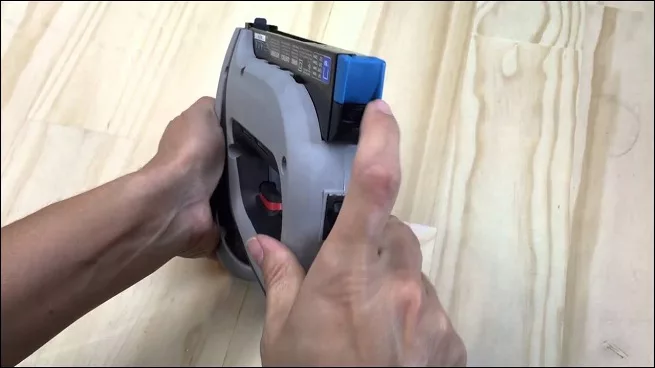
Once you have located the magazine release button, then press it, and the magazine clip should slide out pretty smoothly. You cannot load a staple gun holding the staple gun in its natural position, and you should know that.
To load the staple gun, you have to turn it upside down. So hold the gun upside down and load the staple pins. Try to fill the magazine with the staple pin. Otherwise, you have to load it pretty often.
Once you have loaded the magazine, now it’s time to put the magazine back in its place. Carefully slide the magazine clip in and press it a little until you hear a click sound. When you hear the sound, that means the magazine is clipped properly.
Step 3
The loading process is done; now it’s time to use the staple gun. Plug the machine and turn it on. If you are doing this for the first time, be cautious.
Turn your device on and make sure that your staple gun throws one staple at a time. If you see the machine throwing two or more at a time, the staple gun is definitely functioning wrong.
The best way to try the staple gun is to try it on a piece of wood. But the thickness of the wood should be the same as the material you will be stapling.
Pick a scrap wood and try stapling that. If you see it is working fine, then you are all set to use the gun on your project work.
Top Loading Pneumatic Stapler
The top-loading Pneumatic Stapler is a little different from the bottom-loading staple gun. So the process of opening and loading is quite different.
Step 1
Firstly, disconnect the stapler from the electric source. Or you can turn the machine off by pressing the off/on button. If you are not finding the switch, most of the time, the switch is placed at the back of the model’s tank, which looks like a Cylindrical shape. Plus, that contains pressurized air as well. Once you have turned the switch off, time disconnect the hose release.
For that, you have to loosen a nut that is underneath the device. You might be unable to loosen that with the bare hand; try to do that with a screwdriver.
One important thing, if your Pneumatic stapler comes with a safe trip, make sure you put that in place. That is extremely beneficial because it prevents the staple shooting when you are reloading.
Step 2
Now time to disconnect the magazine follower as well. In case you don’t know what magazine follower in the pneumatic stapler is, there is a rod that was placed there to set the clip-on spot. To disconnect that, you have to push the lever and pull that off from the gun. Keep the magazine follower as far as possible; since the clip is pulled out, it should stay locked in its place.
Step 3
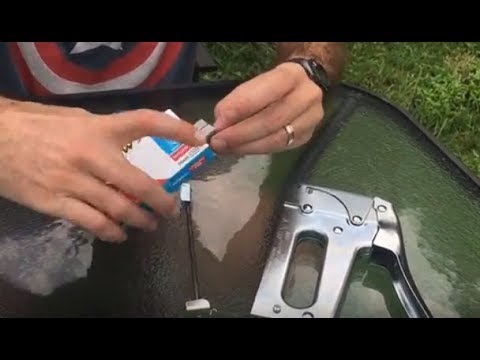
Time to load the staple. Pick an entire strip of staples and put them into the magazine rail. I hope you know which is the right position to load the staples.
When you are putting the staple strip, make sure they slide easily without sticking. And then release the lever. The gun’s follower should be unlocked properly.
In some latest models, a staple gun automatically takes the staples in. But if your staple gun doesn’t do that, give it a little push.
Step 4
We are done! Now time to take a test. Plug the compressor into the staple gun. And connect the hose as well. Wear safety gear such as safety glasses.
Start the compressor and use the staple gun on a piece of scrap wood. Pick a thicker wood so that you would know about the strength of the gun as well.
Conclusion
I hope you have learned how to open a staple gun and how to use it. We have tried to give you all the basics, which are enough to get you started. If there is anything you are confused about, do not hesitate to let us know through the comment section.