A staple gun is a tool that permits you to staple several elements. This tool is popular due to its fastening characteristics onto paper, plastic, synthetic, and wood.
Generally, a staple gun is a sturdier and more authoritative version of the office stapler.
Many of us face problems while using a staple gun and then surf the internet, searching for “how to fix a staple gun spring.”
In this article, I will explain a step-by-step process for the most common problems of a staple gun.
So, let’s discuss this briefly.
What are the Common Difficulties to Fix a Staple Gun?
Before going to the staple gun problem fixation section, you need to know the typical difficulties of a staple gun.
Destroying spring is one of the most common difficulties of a staple gun. Besides this, other difficulties are
- To many staples.
- Run-down spring.
- Spring gets worn.
- Difficult trigger.
- The Gun gets jammed.
- Shoal stapling power.
- Configuring staple gun.
- The hammer gets clogged.
- Staple gun damages.
Reason Behind Different Problems
For every problem, there is a reason behind it. The reason can lead you to the solution, too. Find out the reasons behind different problems and solutions below.
Hemmer Gets Clogged
Is your staple gun not hitting the individual staple in the correct order? Basically, it happens due to the misshape of the staple.
You need to check whether you are using the right-sized staple in this regard.
Then, it is time to open the staple gun and test the hammer by applying some pressure on the head of the stapler. The hammer should not create any obstruction to slide it downward.
The good news is that you have most of the difficulties, and you can solve them easily using a screwdriver.
If the hammer gets clogged due to grease and dirt, use a degreaser like white vinegar to eliminate this hammer-clogged problem.
Moreover, applying some lubricant will allow the staple gun to function smoothly, and the tension will remain perfect during every fire.
Spring gets worn
Are you not getting enough tension from the spring of your model? If yes, then note that the model doesn’t have enough force to fire new staples consistently.
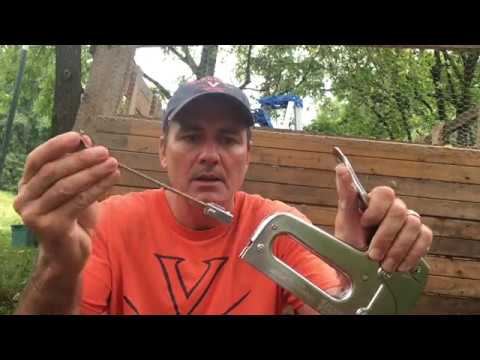
You can test the spring of your model by yourself. To do this, open the staple gun carefully first. After that, slide the spring and let the spring go.
If the spring comes in contact with the staples bar without losing time, be sure the spring is in good condition. And if the reaction of the spring is too weak, note it is time to purchase a new staple gun.
Design
There will always be places on your job site where you can’t take the staple gun with you due to its design. But without the presence of a staple gun, you can’t accomplish the project. Now, what can be done?
At this time, you have no other choice but to continue work without a staple gun and have to find an alternative way.
To solve this problem, you can get help from a good old hammer and a few nails. Sometimes, both of them are better performers than your upgraded staple gun.
How to fix a staple gun Spring – Step-by-Step Procedure

A staple gun is not a toy. But if you are trying to play a game using it with your colleague or friends, it will give you some difficulties that you may sweat your forehead to fix.
Step 1: Unplug the Power Source
Firstly, it is essential to unplug the power source of the staple gun. Never start doing maintenance of a power tool, keeping it plugged with the power source.
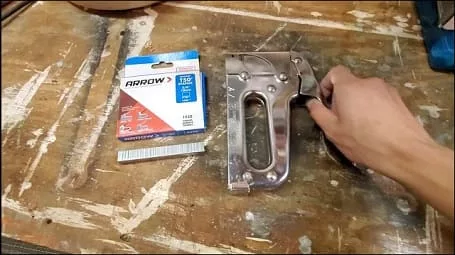
Step 2: Open the Staple Gun
Take a screwdriver to open every part of the staple gun. It would be best to choose a flathead screwdriver to perform this job.
The staple release head is the key point for your heavy-duty staple to fill. Once the staple gun is opened, keep the staple clip aside.
Step 3: Take the Jammed Staple Out
Now, take needle-nosed pliers and utilize them to hold the fixed staple and stretch the fixed staple out. You should safely remove it by rotating your course and using a filled staple.
If you don’t own a set of needle-nosed pliers, get help from a flathead screwdriver to remove the jammed staple.
Step 4: Fill the Staple Gun Up
Find the best staple clip you choose earlier and re-insert it at the main top. Load the staple gun using standard. Before placing the staple pieces into the staple gun, you need to make sure that the staple pieces are standard in length.
Step 5: Close the Staple Gun
The stick needs to be connected to the staple discharge point. If you missed out on correctly connecting the stick at the staple discharge point, the staples would not be operated at the right angle.
Also, the loose staple may come to your eyes directly! So, correctly connecting the stick to the staple discharge point is considered crucial.
Step 6: Start Using the Staple Gun
We are at the last stage of this task. Connect the staple gun to the power source. It could be using a battery, an electrical power source, or compressed air.
Keep the syringe securely on the recommended cover and use it continuously.
Conclusions
As you have already understood, a staple gun is easy to use, powerful, and can undoubtedly improve your productivity when accomplishing a task.
But one dragging point of this tool is they get jammed too quickly. Also, you will wonder when you will learn a staple gun is responsible for 40,000 accidents yearly in the United States.
The above-discussed points will assist you in fixing a staple gun spring, and you must know that this is a common staple gun’s basic problem and efficiently teach you how to avoid getting hurt by this small tool.
Best of luck while working with a staple gun!