Tiles are hard and durable, covering the walls and floors, and with proper installation and maintenance, they last even decades. You may need to lay pipes or install new pipes under tiles. It is easier to cut through them than to remove them.
Notably, you only need to know how to cut installed tiles and the tools you must have at hand. Cutting an installed tile needs hand tools. Working with a manual cutter is critical since it helps you make square cuts or cut large sections of the tile.
If you need to install pipes, you must make circular cuts, and the manual device does it best. The tools ensure you make a perfect cut not to spoil the tile, and protective gear ensures your safety from dust and toxic gas.
Advantages of Using Manual Tile Cutter
It is advisable to use manual tile cutters when making cuts on the thrilled tile. For that reason, you have the responsibility to look for the right model for the best performance and quick project completion. Besides, there are various advantages of using the appropriate tool in your working place:
Mobile
Mobility is one of the advantages of using a manual tile cutter in your working area. The device comes with no connecting cable hence which makes it possible for cutters to move around tiles fluidly. Whether you need to work in the living room, garage, or garage, a manual cutter is important since you can use it anywhere.
Easily practical
Another benefit of relying on a manual cutter is its practicability in operation. With this tool, you don’t require to make adjustments in your pace, timing, and movement since they take the shape of a pair of scissors that make it ready to use. The lightweight construction also makes transportation much easier due to its high portability. Accordingly, the device can enable users to operate for long hours without fatigue.
Adaptable
A manual cutter is highly adaptable due to its high mobility and practicability. Adaptability is necessary when you are rushing to fix tiles and complete cutting without much trouble with electric and power cables.
The tool can help you adjust your project and working area due to fewer restrictions on heavy equipment. With this type of cutting tool, you can also make adjustments to any kind of tile, including large-format and basic tiles.
Easy cleaning
The next benefit that operators can enjoy while using manual tile cutters is simple cleaning. Manual cutter is highly reliable when it comes to cleanliness, unlike electric cutters that leave a lot of mess during cutting. When using an electric cutter, you can experience more dust production and much scattering due to the electricity power. However, it is different when using manual cutters since they produce less dust which maintains cleanliness in the working place.
Steps To Follow To Make A Perfect Cut
1. Clearing the area
It would help if you got rid of anything in the area you are working on. Additionally, tape and mask off the room from all others in the house for their safety and to avoid interference. The room must have good ventilation and a fan because the dust given off is toxic and lethal. Moreover, ensure no child or pet is in the room before you start working.
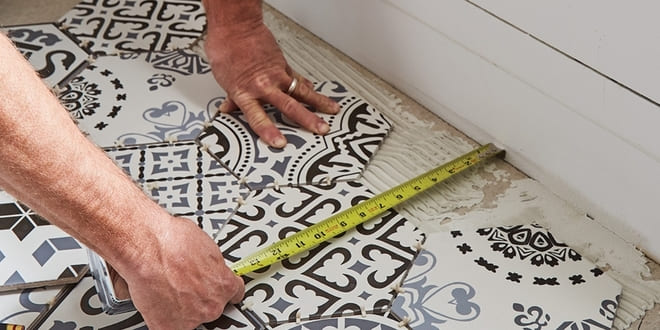
2. Cut a straight edge to mark your line well
After you start the cutting process, it gets dusty and hard to see. Therefore, using a grease pencil, you must straighten the edge to mark your line well. Taping along the side of the line helps you protect the edges from chipping.
3. Put on protective gear
You must guarantee your safety by putting on safety gear and placing the fan in a place where it directs the air of the room to the window. When making a horizontal cut, have a helper standing at the side of your working area.
They will vacuum with one hand and splash water on the cut side. In such a case, you must work as a team as one cuts, and the other reduces the airborne silicate. It is done by vacuuming immediately and splashing water to help in the cut. Notably, water helps reduce dust; if it is a wall, you may use a spray bottle.
4. Cut the tile
Cut across the tile using an angle cutter. In the case of a curved cut, it is necessary to make small straight cuts and use a Dremel device to clean the curve. The manual cutter can become larger as you get near a wall; hence dremel is important for cutting narrow spaces.
5. Vacuum the room
Safety is important, so you must ensure the room is free of toxic gas. Use the shop to vacuum the room before removing your respirator. Additionally, it keeps the fan running even after you think there is no more gas. Furthermore, Wipe the room well using a wet rag and then leave the room. Take off your respirator, and do not track the dust everywhere.
Final Thought
Cutting out installed tiles may seem like a hard task, but it becomes possible with the right tools at hand. The only question you must answer is how to cut installed tiles. Notably, tiles make a place beautiful, and with proper installation, they may last decades.
You will not want to spoil a tile’s durability and go back to the shop because they are expensive. Therefore, you must be cautious when cutting the installed tile to ensure you do it well.
The tool helps you make circular cuts and square cuts in the tile. Always remember to keep your safety in mind and put on protective gear. Kindly visit our website to get more information on how to cut installed tiles.